Wednesday 28 August 2013

Purple and Gold smokey eye ...

Hey guys :)


I have a really lovely makeup tutorial today using purple and gold, this is definitely not a day time to look as it is pretty heavy eye look, the blending for these kind of looks may not be easy the first time but if you keep practicing you'll master it. Also a little tip using purples really enhances any hints of green in your eyes, and if you have a brown eyes can really help to make them pop.


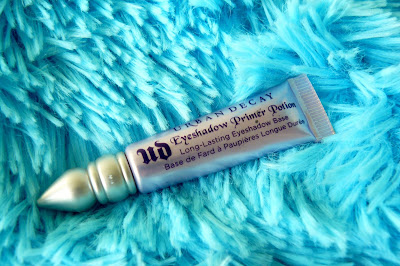
First make sure you prime your eyes, I know I say it on ever post but it really does make the world of difference, today I used Urban decays primer potion, then pat on a gold colour onto the lid, don't worry if it's not really heavy just yet ,we will add to the gold later. I used half baked from the Urban decay Naked palette.


Take a matte purple colour, if you can find a brown based purple this would work best, and if not a soft brown colour would work as well, this is just your transition colour and is mainly for blending, I used Forgiveness from my complement palette from Illamasqua.


Blend a shimmery purple into the crease, outer V and inner corner, extend outwards in a cat eye effect, I used Rockstar from the Urban decay Smoked palette.


Line the lash line with liquid liner and take a darker purple on a small brush and darken up the crease slightly, this is where you can make the look alot darker then mine is if you like. I used Queen of the night from the Illamasqua complement palette. Also take some more of the gold and pat on the center of your eyelid. 


 Then add some false lashes for added drama to this look, I find when I do heavy eye looks fake lashes really help finish a look, these are the katy perry lashes, I think they are called kitty or kitten I cant remeber because I don't have the box but I know it's a yellow box.


Run some of the darker purple along the lower lash, add some gold in the inner corner, and use a purple or black eye liner on the lower lash line I used prunella from MAC, then add some mascara to the bottom lashes.


 For this look I think a bold brow works really well, take a dark brown shadow and an angled brush and fill in and perfect the shape, I used a dark brown shadow from this MAC palette, then highlight under the brow this helps to lift the brow, firstly I used a matte colour called kinky from the Urban decay Smoked palette, then I went over that with a shimmery colour called slink from the Complement Illamasqua palette.


For the skin use a primer, and medium to full coverage foundation, cover up any imperfections with a concealer and set with a powder.


Warm the face up with a bronzer and highlight the cheeks with a warm toned shimmery colour, I used my MAC minerilazed skin finish in Gold rush (unfortunately this was limited addition so you cant get it anymore).


Lastly for lips use a pinky nude lip liner to line and fill the lips then go over with a gloss with gold shimmer, I used  a gloss from rimmel called non stop glamour.


And that is the look finished.


 I will be doing a tutorial soon on how I got this wavy glamorous looking hair, it isn't as hard as you think.


Becki x


Monday 26 August 2013

Grungy eye look , using urban decay Naked 2 palette

Hey Guys


It's been quite a while since I used my naked two palette, but I took it away with me last week and fell in love with it all over again, so I thought I'd do you guys a blog post using it, but I didn't want to go for the usual natural eye, or gold smokey eye or something along those lines as there are loads of blog posts doing that, and after racking my brain for a while I decided to do a bronze grungy look, seen as though this autumn there is a lot of grunge influence in fashion with all the tartan and leather, and I have to say I have been loving this look and I think it will be a definite go to look for me this autumn.


For a base I used the Rimmel london scandal eyes pencil in bad girl bronze, this is a lovely brown with bronze shimmer in, and these pencils are amazing bases as when they have dried they don't smudge or crease.


Next I patted on lots of suspect all over my lid, which is a very cool toned bronze/gold colour, I did this quite heavy as I wanted the lid to look very metallic.


Now take snakebite on a fluffy brush and blend  into crease and outer part of the lid, to make this grungy you need to blend quite high up above the crease and make sure the eye shape is rounded and there are no harsh or clean lines, it's supposed to look messy and sort of slept in.


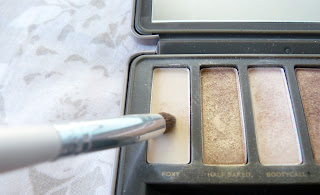
Now take some of snakebite and some of suspect and run it along the bottom lash line, line the water line with a dark brown pencil, highlight the inner corner with a bit of bootycall, and highlight under the brow with foxy. I then added as much mascara as I could using four different kinds, you want the lashes to look really heavy with product and very black, then I went in again with my fluffy brush and snake bite and darkened up the crease some more.


Now you want to keep the skin simple so all the attention is on the eyes, I just went in with my Chanel perfection lumiere foundation, covered any imperfections with concealer, I added a little bronzer to my cheek bones to contour it, and on this occasion I didn't use a blush or highlight.


And finally lips I used two different colours to show how this look can work in different ways, for more of an everyday look, I used my number 17 mirror shine in Beehive which is a lovely sheer pinky nude.


And for my favourite lip colour with this look, which goes really well with the grungy theme of this makeup and is a great colour for autumn, I used Topshops lipstick in Beguiled which is a dark purpley red, it is showing up a lot more purple on this photo then it looks in person.


I love this look for the Autumn, it looks great both at day or night just by simply swapping the lipsticks, although I do enjoy wearing a bold lip in the day so personally I wear the purple lip both at day and night.

 Becki x

Saturday 10 August 2013

Dramatic eye, using Zodiac moondust from urban decay

Hey Guys :)


Last week I put up a review of Urban decay's Moondust shadows, so I thought I would put up a tutorial using one of the shadows, and after thinking about it for a while I decided to do a really dramatic eye look using the moondust in Zodiac. Now this is a very dramatic eye so it's probably not an everyday eye ( unless you can pull off something this dramatic in the day then go for it) and for alot of people this may be even to dramatic for a night time look, but you could you always tone it down a bit and adapt it to what best suits you.

First things first put plenty of moisturiser on, this is going to be a heavy look and a lot of makeup, so trust me your skin will thank you for putting on the moisturiser, also leave you foundation until after you have finished your eyes there will be a lot of fall out that you will want to clean up before doing your foundation and concealer.

As you are working with dark eyeshadows its best to use an eye primer, this will help the colour really stick, stop it creasing and help it last all night, I used my trusty Urban decay eye shadow primer. If you don't have an eye primer you can always put a little bit of concealer on the eye lid instead.


The next step might sound a little strange but you need to take some sticky tape, first just stick it on the back of your hand a few times to take off some of the stickiness, then place it at the side of your eye where you want the bottom of your flick to be, make sure it is straight and stuck down well.


Now take a black eye liner this could be a pencil or liquid and roughly outline the shape you want your eyeshadow to be in, this doesn't need to be neat as you will be covering it all up with eyeshadow, this is the part where you can tone this look down a little by doing a smaller flick. This is also the time to get the flick looking even , now I do struggle with this as one as my eyebrows lies lower then the other, but just get them as even as possible or until you are happy with them.


Take a matte black eyeshadow and fill in the shape that you have drawn, make sure that is completely covered and is the shape you want, then you can remove the tape, and you will see that it really helped to create a super straight crisp line.


Now for the fun part, it's time to add the super shimmery and glittery zodiac shadow, I started adding it on with a brush but it wasn't going on as heavy as I wanted so instead I have found that these shadows work better when using your fingers, so press it on with your finger and if you go outside the line of the flick take a makeup wipe or cotton bud and clean it up.


To finish off the eyes take a black liner and line the water line, then add lots of mascara you need your lashes to stand out, so I used three mascaras to achieve really dramatic dark lashes.


Then for the face, I used my MAC studio fix foundation as it has great covereage and gives the skin a flawless look, I then added quite a strong contour to my cheek bones then added a highlight on top.


To finish off the look I used a really pale nude lipstick called fawn from topshop, you want to keep the lips nude as you want all the attention on your eyes.


  Here are some close ups of my eyes finished, and so pictures of the finished look.


 Becki x